Wednesday, November 18, 2009

Jolly Santa

Hello there! Whenever I heard the word J-O-L-L-Y, I always thought of Santa Claus! So when I saw this really cute Santa from this blog, I just had to CASE it. LOL. And since I had that glitter paper from Marcella K that I've used a couple of times for my ornaments, I thought that same glitter paper (in red!) would look great as Santa's hat! I simply punched out a 1 1/4" square, cut it half, used the first half as Santa's top hat, and a portion of the second half with the pom-pom. Easy peasy!


I had been in a red-and-green mode for Christmas cards. So I knew my Santa had to come with the red striped pattern from SU's Merry Moments DSP. The beautiful red ribbon is from Michael's. And the sentiment is from SU's "Jolliest Time of the Year".


Stamp: Jolliest Time of the Year

Ink: Basic Black

Paper: Real Red, Whisper White, Basic Black, Blush Blossom, Pretty in Pink cardstock; Merry Moments DSP; glitter cardstock from Marcella K

Accessories: red ribbon from Michaels; SU 1 1/4" square punch, scallop circle punch, 1 3/8" circle punch, 1/4" circle punch, crystal effects (used as glue).


Thanks for looking!

Monday, November 2, 2009

Mojo Monday 111

Hi! I wanted something Christmas-sy for my Mojo Monday entry; and I could not find the "perfect" stamp set I would like to use. I did not have any SU wreath stamps so I took out my small SU star punch and started punching away, using Certain Celery and Old Olive cardstock.


Using crystal effects as glue, I adhered all the stars onto a 1 3/4" circle (punched out 0f course) of Whisper White cardstock. I used this circle as my guide so my wreath would come out in a somewhat round manner, or whatever semblance of roundness... LOL. I adhered my all-time favorite red swarovski crystal rhinestones randomly around the wreath. I then took several inches of a satin ribbon and shaped it into a bow, and using crystal effects again, stuck the bow onto the wreath. And there you have it, my mojo card. I hope you like it! Thanks for looking -


Stamps: Snow Swirled (sentiment and snowflakes)

Ink: Real Red, Old Olive

Paper: Old Olive, Certainly Celery, Real Red, Whisper White cardstock; Merry Moments DSP
Accessories: SU wide oval punch, SU small star punch, olive satin ribbon and red satin ribbon from Michaels, clear and red swarovski crystal rhinestones; SU crystal effects used as adhesive


pronounced ray-dis

Tuesday, October 20, 2009

Mojo Monday 109

Hi! I'll make it quick - coz I gotta run, badminton today and I'm all pumped up. It's something I look forward to every Tuesday. Here's my card for Mojo Monday. I used an old metallic gold cardstock as my background. The overall card reminds me of Christmas cards my family used to give out and receive years ago..... What do you think?


Stamp: God's Blessings

Ink: Chocolate Chip

Paper: Real Red, Old Olive, Whisper White CS; gold foil metallic cardstock

Other: Big Shot, Little Leaves, 5-petal punch, citrine swarovski crystals, scallop edge punch, red and gold wired ribbon


Thanks for looking!


Sunday, October 18, 2009

Snow Swirled Christmas Tree

Hi! My card today is a variation of one I made last year. I love the Petals-a-Plenty embossing folder and have been using it any chance I get. It makes my background go from ho-hum to wowza! LOL. I also brought out my Snow Swirled stamp and inked the tree in Old Olive. The red bling comes from red swarovski crystals - boy, do these little darlings really make this card stunning in person. My camera doesn't do justice to this card! And as with any Christmas tree, I put a golden star at the top - a golden star brad, that is!


Stamp: Snow Swirled, Lots of Thoughts
Ink: Old Olive
Paper: Real Red, Old Olive, Whisper White, Choco Chip CS
Accessories: Big Shot, Petals-a-plenty embossing folder, small oval punch, ribbon, swarovski crystals, gold star brad, crystal effects

Thanks for looking!

Friday, October 16, 2009

Testing

Testing

Monday, October 12, 2009

Mojo Monday 108

Hi! It's been awhile since I made a card using a Mojo Monday sketch. I finished one Christmas card already using a vertical layout before I saw today's sketch and I thought, hmmmm, why don't I just rotate the card and use a horizontal layout? Here's what I came up with:
Below is the Mojo Monday sketch I followed:
And below is the first card I made before I decided that I will use the same cardstock, same stamp set and DSPs - basically the same idea - except that I made it work for the Mojo sketch. I felt so creative because I finished TWO cards in one morning! LOL. Please tell me what you think! Thanks for looking....

Stamps: SU Season of Simple Grace
Ink: Soft Suede
Paper: Soft Suede, Real Red, Whisper White cardstock; Christmas Cocoa DSP
Accessories: Soft Suede grosgrain ribbon, scallop circle punch, 1 3/4" circle punch, large snowflake punch, mat pack.


Thursday, October 8, 2009

Christmas Ornament Punch Cards

Hi! Ten minutes! Ten minutes was all it took to create each Christmas card I have below. Can you believe that? One card is in Real Red; the other is in Elegant Eggplant. I wanted to create Christmas cards using the Ornament Punch with minimal stamping, on my end. Then I remembered that I had bought this glitter cardstock by Marcella K at Target last year. So now, I have several no-sweat glittery ornaments! I love it!
Thanks for looking.


Stamp: Warm Words
Ink: Elegant Eggplant, Old Olive
Paper: Cardstock in Real Red, Whisper White, Elegant Eggplant; glitter paper from Marcella K
Accessories: SU Ornament punch; SU Petals-a-Plenty embossing folder; SU large oval, smal oval and scallop oval punches; 1/8" hole punch; gold and silver cords.

Sunday, September 20, 2009

Halloween Scallop Square Treat Bags

Hi! I just received my new Scallop Square Big Clear Die, and I could not wait to play with.... Of course Halloween was on my mind (even though we're still a few weeks aways!). Lookie at my new goody bags. I simply ran a Pumpkin Pie cardstock thru my Big Shot and my Scallop Square Big Clear Die and I have a nice topper. The stamped pumpkin and sentiment came from SU's new Pumpkin Patch set - new from the Holiday Mini Catalog. The circular hole on the topper was punched using the 1 3/8" circle punch. The leaf punch is from Martha Stewart. The ribbon was from the Sale-a-bration promo early this year. Now I have a bag of M&Ms... you can also use chocolate balls (you can purchase a variety at Costco!), sweet tarts, candy corn or jelly beans!

Thanks for looking!

Stamp: Pumpkin Patch

Ink: Pumpkin Pie, Basic Black

Paper: Pumpkin Pie, Old Olive, Whisper White cardstock

Accessories: Big Shot, Square Scallop Clear Die, 1 3/8" circle punch, 1 1/4" circle punch, word window punch, Certain Celery ribbon, cello bag

Thursday, September 10, 2009

Halloween Treat Bags

Hi there... Is it Halloween yet? I got inspired by an old post from Patty Bennett's blog here - it's a Top Note Die Goody Bag for Christmas. I changed the colors so that I can make some treat bags come Halloween time. Do you like it?


I started with "paper sacks" bought from Michaels that were trimmed to 3" high. I then covered them with 2 Top Note Die in pumpkin pie color. I punched out handles using SU's Word Window Punch. I also used my new SU stamp set called Pumpkin Patch. If you noticed, my ribbon is from the Sale-a-bration promo from February! The sentiment "from our patch to yours - happy halloween!" was punched out using the Modern Label Punch. I used a tiny hole puncher on my labels and some gold thread to hang my tag. And here we go... a nice looking Halloween treat bag! All I need now are candies and chocolates to fill it in!


Thanks for looking!

Stamp: Pumpkin Patch
Ink: Basic Black, Pumpkin Pie, Old Olive
Paper: Pumpkin Pie, Whisper White cardstock
Accessories: Modern Label punch, SU Certain Celery ribbon from Sale-a-bration promo Feb 09; Word Window punch; paper sacks from Michaels; thin gold thread.

Tuesday, September 8, 2009

Halloween "Boo" To You

Hello there! I was trying to make something different with an old SU set called Booglie Eyes. The thought occurred at the last minute when I wanted to put the greeting "Happy Boo To You" on ...and flat on the card just did not cut it. I then took a good length of bead wire, rolled it around a pencil and voila, I have a spring...and my greeting pops up and bounces like C-R-A-Z-Y! I thought it looked nice....


I have not decided yet if I'm gonna color the Dracula and Frankie images. The first picture above looks pretty normal huh. See below how the pop-up sentiment looks like:

First time I make this kind of card; please let me know what you think! Thanks for looking -

Stamps: SU Booglie Eyes (retired)

Ink: Basic Black

Paper: Basic Black, Whisper White cardstock; Ghosts Greetings DSP (retired)

Accessories: SU 1 3/8" square punch; spiral punch; SU watercolor pencils; bead wire

Sunday, September 6, 2009

Vampires Rule!

... and werewolves drool! LOL. I've been thinking of the movie New Moon and according to another blogger, it's only 76 more days before that movie is shown... In the meantime, I was inspired by Kay's vampire matchbox which can be found here. I CASE'd the matchbox, added/changed some things and made it into a card... And voila, here is my Edward! If you've read the Twilight Saga, you know that Edward sparkles..... so I used SU's Shimmery White cardstock. But I tell you, my camera doesn't do the card justice. Hahaha. I used different punches for the eyes and added an extra layer of Elegant Eggplant around his eyes to convey "dark shadows - purplish, bruiselike shadows" as the books describe them. His fangs have a hint of red in them.

Inside the card, I put the words "Bite Me" in Script font and stamped the apple image over it. The apple image comes from Stampin' Up's "Tart and Tangy" set. I hope you like it. Thanks for dropping by!


Stamp: Tart and Tangy
Paper: Basic Black, Shimmery White, Real Red, and Elegant Eggplant cardstock
Ink: Real Red, Old Olive, Basic Black
Accessories: 1 3/4" circle punch, 1 3/8" circle punch, 1 1/4" circle punch, white gel pen, large star punch

Wednesday, August 26, 2009

Night & Day Card


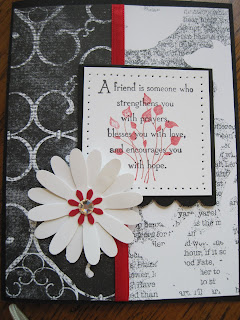
Hi there! I was having fun with my new Night & Day DSP, and was so happy that SU has come out with black and white designer papers. How cool can that be? The sentiment comes from one of my favorite SU sets, "God's Blessings". The image in the center came from "Pocket Silhouettes", was stamped using Real Red ink. My ribbon came from Michaels. The large and small daisy punches are my old Fiskar punch - still had not found anything better to replace it! Plus I brought out a bigger-size clear Swarovski crystal as the flower center - added some bling to it!
Enjoy the day!

Tile Coaster Project

Hello there! Here's the story behind these tiles: my two younger children announced yesterday morning that they were bored! They saw me dusting off a pack of 4x4 tumbled tiles I bought almost a year and a half ago, and they asked - what are those, mom? I answered that these were tiles. They asked again - what will you do with them? I replied, I'm thinking of stamping on them.... And my kids go, can we, mom? can we? Ugh, so the tiles that I had intended to stamp on for myself got divvied up and the two youngsters used up two each. Holy moley. They sat at my dining table, totally engrossed in stamping and "painting" (actually using blender pens) to their little hearts' delight! I was happy to note, that it was a productive morning.... LOL!

The first one is what my 4-year old son did. He chose a car stamp from the retired set "By Land". I helped him use the Stazon ink and stamp the car on the tile. He then added the colors he liked. He chose blue and yellow from the Chalk palette and when he was done, I simply had to sponge more around the car, so that the colors will pop out more.... Do you like the little hearts he drew?


This second tile is what my 8-year old daughter finished. The stamp is from the "Asian Artistry" set, a Level 2 Hostess set. She colored the bird a bit bluish, and then sponged the area with blue and pink. I thought that was pretty!


While the youngsters were busy, I actually finished two tiles! Imagine that! I stayed with the Asian theme, also used the "Asian Artistry" set, but I made my colors purple.


This is my other tile. The set I used is from "Dream Garden" - loved that girl in the kimono dress. When I first saw this set in the catalog, oh me oh my - I knew I gotta have it! It's a wonderful thing that Stampin' Up came out with two Asian sets this year....


The only thing the tiles lack is the cork coaster underneath, I'm having a hard time finding those things.... Well, if I don't get my hands on them soon enough, I will probably put "fuzzy feet" on them... For complete directions on making tiles like these, go here.

Wednesday, July 15, 2009

Celebrate Today

Hi! I was in a blue-and-brown color mood... so I took out my all-time favorite cardstock color - Chocolate Chip! The blue is SU's retired Baja Breeze cardstock, which I ran thru my Big Shot for that nice embossed background. The Italian poetry background stamp from HeroArts is something I've had for so long. I used the Upsy Daisy stamp for my flowers; plus the sentiment "Celebrate Today" from SU's Starring You. I hope you like it! Thanks for stopping by.

Stamp: Upsy Daisy, Starring You; Italian Poetry (HeroArts)

Ink: Chocolate Chip

Paper: Chocolate Chip, Baja Breeze

Accessories: polka dot grosgrain ribbon from Michaels, SU mat pack

Sunday, July 5, 2009

Dreams Du Jour


Hi! I made this card in the middle of June, just before I got busy with my children's year-end activities, visiting friends and birthday parties! The layout was one of Jodi Collins' CASEworthy cards. I changed the colors, the DSP, and the stamp image BUT case'd it down to the paper piercing. It was a great way to practice getting my piercings aligned! LOL. Thanks for looking!
Stamp: Dreams Du Jour

Ink: Basic Black

Paper: Tangerine Tango, Whisper White, Basic Black cardstock; Haiku DSP (retired)

Accessories: mat pack, SU scallop edge punch, decorating chalk, black square brads

Wednesday, July 1, 2009

Absolutely Fabulous Again!


Hi! Happy 1st of July! Can't believe we're already halfway thru the year - it's amazing how time flies. Well, July 1st means a brand new SU catalog! Woohoo! Am so excited! My card here uses the same layout in my previous post, but using the Razzleberry Lemonade DSP and matching polka dot ribbons. Yum yum. As always, this card is good for saying hello to friends, thinking of yous, for birthdays or for thank you notes... Thanks for looking!
Stamp: Absolutely Fabulous, Humor in High Heels
Ink: Basic Black
Paper: Whisper White, Melon Mambo, Crushed Curry, Razzleberry cardstock; Razzleberry Lemonade DSP
Accessories: Razzleberry polka dot ribbon, swarovski crystal flatback, mat pack

Wednesday, June 17, 2009

Absolutely Fabulous

Hi! My younger daughter has been an absolute darling the past few days. Last Monday, she had ballet dress rehearsals which lasted more than two hours - longer than it should be because they started late. Shortly after that, I whisked her away so we can catch up dinner being given to her choir group. She was so cooperative and easy that I simply melted, despite my feeling stressed out squiring her about with a three-year old in tow. Tonight I get to watch her onstage for her actual dance recital! And this is the card I made for her... She saw me making this card and remarked that she liked the colors, the dress, and the little sparkle coming off the Swarovski crystal!


Stamp: Humor in High Heels, Absolutely Fabulous
Ink: Basic Black
Paper: Pretty in Pink, So Saffron, Whisper White, Almost Amethyst cardstock; Tea Party DSP
Accessories: SU certain celery twill ribbon, mat pack (for piercing), clear Swarovski crystal flatbacks, tiny Daisy punch (from Target).

Tuesday, June 16, 2009

Way to Go!


Hi! It's a busy, busy week for me this week.... The girls have their dress rehearsals and their dance recitals; their Field Days and their End-of-Year Programs, and their usual swimming & choir practices; and flute and piano lessons..... (my little son has one End-of-Year Program - that's a story for another day). Aaaarrrgh! What's a mom got to do? These are the days when I wish I have another pair of arms and legs ...or better yet - I wish I have a clone! LOL. The card I have today is for a friend's son who graduates from high school this week and will go to Westpoint Military Academy for college. That boy is seventeen, but for the life of me, I cannot imagine myself in his mom's shoes! All I can say is, they are both brave!

Stamp: Starring You
Ink: Basic Black
Paper: Dark Gray, Whisper White; non-SU silver metallic cardstock
Accessories: SU scallop oval and large oval punches; SU large star punch; clear Swarovski crystal flatbacks.
Have a great week! Thanks for dropping by -

Friday, June 12, 2009

Just For You


Hi! When I first saw this card by Jodi Collins, I knew I had to CASE it. Of course, it just took me months to get going... LOL! Well, here it is, finally! With my kids out of school for summer next week, I'll say, I might not be able to make cards in years! The nice thing about CASE'ng somebody else's card is I didn't have to use a lot of brain cells for the layout . I only had to come up with my choice of colors and alternate embellishments. All the DSP came from SU's Georgia Peach DSP collection - it's retiring, I believe. The piercing part was challenging for me to do. But I am very pleased with how the card turned out! Thanks for looking!
Stamp: Oval All, Flower Fancy (cut-out leaves)
Ink: Old Olive
Paper: Old Olive, Whisper White, Pink Pirouette cardstock; Georgia Peach DSP
Accessories: SU scallop oval and large oval punches; Fiskar large and small daisy punches; mat pack, crystal Swarovski flatbacks

Tuesday, June 9, 2009

Come sail away with me


Hi! It was my wedding anniversary yesterday. My hubby is an avid sailor so I made him a card with ... a sailboat on it! The sailboat image is from PSX; it's a stamp I've held on for years and years now because I can't find a better sailboat stamp out there. The sailboat image has two tall masts and does not look juvenile - definitely great when you're making a card for an adult male. My base cardstock is Chocolate Chip. I layered a piece of Close to Cocoa and ran it thru my Big Shot using the Background I Texturz Plate, Polka Dots. The sentiment "come sail away with me" came the old-fashioned way - from my printer using MS Word! LOL. Lastly, I had this Blue Moon charms from way back - so that nautical wheel came in handy! Come to think of it, this card will also work for a adult masculine birthday! Hmmmm, now I need to make more. LOL. Have a great day!

Stamp: PSX

Ink: Basic Black

Paper: Chocolate Chip, Close to Cocoa, Tempting Turquoise, Whisper White

Accessories: Blue Moon charms, decorative chalk, Big Shot, Backgrounds I Texturz

Sunday, June 7, 2009

Fabulous Friend


Hi! A wonderful friend of mine is coming to visit at the end of June. She is what I call a fabulous friend - someone who listens without making any judgments or criticisms. She has three older children and I love how she imparts bits of wisdom to me; after all, she's ahead of the journey called motherhood. When she's around, she works her schedule around mine, and she simply takes charge of my kids to allow me some breathing space without even taking credit! So my precious friend, this card is for you...

The base cardstock is Riding Hood Red. I used the same color to ink or color in the rose image so that everything matched with the Bella Rose DSP colors. There's a piece of vellum on top of the Bella Rose DSP - it's meant to mute the DSP so that the focal point would be the lovely rose image from the Fifth Avenue Floral set. I also ran that same piece of vellum thru the Big Shot Texturz Plates 1, the polka dots pattern. I did that so that the vellum will have a bit more dimension instead of being flat. The result however is difficult to see in this picture! I also drizzled a bit of dazzling diamonds on my rose. Note that the rose is multi-layered... for an added touch!

Stamp: Oval All, Fifth Avenue Floral

Ink: Riding Hood Red, Basic Black

Paper: Riding Hood Red, Kiwi Kiss, Whisper White cardstock; Bella Rose DSP

Accessories: SU's 5-petal punch, scallop oval and large oval punches, vellum, Big Shot, Textured Plates I, red ribbon from Michaels, SU dazzling diamonds.

Thanks for looking!

Little Japanese Girl


Hi! I am so excited! I finished making my first Japanese Girl card using one of the stamps from the HeroArts Three Japanese Dolls collection. As far as I can remember, I have always loved images, cultural artifacts, and anything cute from Japan (not just the Hello Kitty stuff). However, I am not a fan of the samurais or the manga anime.

I was so inspired after reading Patti Lee's blog where she featured similar stamps from HeroArts. As I started with my base card, I recalled that the uber-talented Patti loves the color red, and I thought, hmmm, why don't I use red? The red Japanese lantern paper (left of card) is from a pack of origami paper I've hold onto all these years. The gold cardstock also comes from the same package. The kanji writings (right of card) is from a 12x12 paper I bought from Joanns two or three years ago! And well, the black strip? It's SU's Basic Black cardstock. The doll was stamped on Whisper White using Basic Black ink; and then punched out with SU's wide oval punch. I used my old scallop scissors to cut the circle around my doll.

The sentiment "Thank You" comes from a retired SU set called Artfully Asian. If I did not have the pattern paper or the origami paper, I would have used the flowers from that same collection.

Thanks for looking!

Stamp: HeroArts Japanese Doll collection, SU Artfully Asian
Ink: Basic Black
Paper: SU Real Red, Basic Black and Whisper White cardstock; origami paper, DSP from Joanns
Accessories: SU wide oval punch, decorative chalk

Wednesday, May 27, 2009

Pink and Brown Fifth Avenue Rose


Hi there! I found a wee bit time to stamp this morning, and used my Fifth Avenue Floral set along with my favorite color combination - pink and brown. I CASE'd the card and layout from here although I changed a few things here and there. I love the eyelet die from SU's Background I Texturz Dies so I use it with any chance I get - and today was one! The base cardstock is Chocolate Chip. I ran a Pretty in Pink cardstock thru the Big Shot for my layer cardstock. I used Pink Pirouette for the rose image which was stamped with Chocolate Chip ink. I further added outlined the rose with a red SU watercolor pencil and dabbed some dazzling diamonds on it! The leaves were punched out from SU's 5-petal punch. Pardon my ribbon though - I guess I was in such a hurry that I cut it crookedly, and didn't see it until I took the picture. LOL. I haven't decided which sentiment I will add on it. So I left that one out... for now. As always, thanks for looking!


Stamp: Fifth Avenue Floral
Ink: Chocolate Chip
Paper: Chocolate Chip, Old Olive, Pretty in Pink, Pink Pirouette cardstock; Bella Rose DSP
Tools/Accessories: Martha Steward lace edge punch, Michael's pink ribbon, SU 5-petal punch, SU Background I Texturz Die, SU Watercolor Pencils, dazzling diamonds.

Friday, May 15, 2009

Perfect Princess

Hi! I've been having a crazy busy month! I've made some cards in the past that I have not posted yet so I thought that now is a good time to bring those up! The card below is a Perfect Princess card I gave for my friend's little girl's birthday. Of course, the card had to be pink, sparkly and special! (If I may say so!). I hope you like it and thanks for stopping by!


Stamp: Perfect Princess

Ink: Regal Rose, Pretty in Pink

Paper: Pretty in Pink, Regal Rose, Whisper White, Shimmery White; Sweet Always DSP

Accessories/Tools: crystal swarovski flatbacks, crystal effects, dazzling diamonds, SU scallop edge punch, Michael's light pink ribbon


Tuesday, April 21, 2009

My Mommy Rocks!


Hello! My card today is a onesie that says "my mommy rocks!" Isn't that cute? My inspiration comes from two sources. I am sure you already have seen those famous onesies the talented Lauren Meader created a while back! You haven't? You can find it here. My other source is Jen del Muro's post today - see that itty-bitty onesie that says "my mommy rocks"? I do not have that stamp - so I thought I'd get creative! I printed those same words using Microsoft Word (font: Monotype Corsiva) and punched it out with SU's large oval punch. Then I cut out my onesie from Real Red cardstock and layered (retired) Real Red DSP for the polka dot pattern. The rest came easy!

Stamp and Ink: None used
Paper: Real Red, Basic Black; Real Red DSP
Tools/Accessories: Scallop circle and scallop oval punches; large oval punch; 1 3/8" circle punch; small star brads
Thanks for looking!

Saturday, April 18, 2009

Oval All 3x3 Cards


Hi! I saw this really cute 3x3 cards on Rose's blog and I thought - wow, I could do those too! So I took out my two current favorites - Bella Rose DSP and my Oval All set. And voila, I have my own set of 3x3 cards! These are perfect for those last-minute tags for birthday presents and thinking-of-you gifts... Not to mention Mother's Day is just around the corner... Thanks for looking!
Stamp: Oval All
Ink: Riding Hood Red, Kiwi Kiss
Paper: Riding Hood Red, Kiwi Kiss and Whisper White cardstock; Bella Rose DSP
Tools/Accessories: SU Scallop Oval and large oval punches, SU grosgrain ribbon - old olive, Michaels red ribbon

Wednesday, April 15, 2009

Fifth Avenue Floral Mother's Day Card


Hi! Mother's Day is Sunday May 10th. I was thinking of several women friends who asked me to create a Mother's Day card. Well here is one of my creations - inspired by page 82 of Stampin' Up's Idea Book and Catalog Spring Summer 2009 edition... The original idea was sort of a bookmark and the flower image used was from A Rose Is A Rose. Sadly, I do not have that set. But I do have the Fifth Avenue Floral, which came with a rose image! Which happens to be my new favorite lately!

The rose image is stamped on Riding Hood Red designer paper (from the Bella Rose DSP), cut out and then dabbed with SU dazzling diamonds to make it SPARKLE! The leaves have been punched out from Kiwi Kiss cardstock, using SU 5-petal punch, and then adhered underneath the rose. I hope you like it.

Thanks for dropping by!

Stamp Set Used: All Holidays (words), Fifth Avenue Floral (image)
Ink: Chocolate Chip
Paper: SU cardstock in Chocolate Chip, Riding Hood Red, Kiwi Kiss, and Whisper White; Bella Rose DSP
Accessories/Tools: SU chocolate chip grosgrain ribbon, SU dazzling diamonds, SU 5-petal punch, SU top notes die

Monday, April 13, 2009

Mojo Monday 82


Hi! I hope you all had a wonderful Easter! My Mojo Monday 82 card is here... using my favorite color combination of pink and brown. The base cardstock is chocolate chip, but the designer paper is an old one I have bought from Joann's a while back. The image is also from one of my favorite SU sets - Pun Fun. Do you notice the pink hearts are sparkling? (It's probably hard to see in the photo.) I dabbed the hearts with some dazzling diamonds. My flower has three layers and come from different sources too. The brown 5 petal flower is Bella Rose DSP. The light pink flower is Prisma, and the bottom flower is Pink Pirouette cardstock punched from the scallop circle punch. The button in the middle is from SU Button Bouquet. That's about it... I'm pretty sure I didn't forget anything! Thanks for dropping by!


Stamp: Pun Fun

Ink: Chocolate Chip, Pretty in Pink

Paper: Chocolate Chip (base), Pink Pirouette, Whisper White; non-SU DSP, Bella Rose DSP

Others: SU 5-petal punch, SU scallop circle punch, SU scallop edge punch, SU word window punch, prisma flower, SU choco chip grosgrain ribbon, SU button bouquet, dazzling diamonds


Tuesday, April 7, 2009

Mojo Monday 81

Hi! We've officially moved back to our house, yet I still have to unpack so many boxes and organize things. I looked at what the sketch was for this week's Mojo Monday and could not help but bring out my stamps. Dusted them stamps and all my tools, hahaha. You can tell I'm really addicted to these rubber stamps. Here is my card and thanks for looking!


Stamps: All Holidays
Ink: Kiwi Kiss
Paper: Old Olive, Whisper White, Regal Rose cardstock; Georgia Peach DSP
Others: SU So Saffron grosgrain ribbon, Martha Stewart white dimensional pearl stickers, Fiskars large and small daisy punch

Wednesday, March 25, 2009

Easter Daisies

Hi, I had fun playing with my Fiskar daisy punch two weeks ago, that I thought I'd use it again. This time I kept to the Raspberry Tart DSP colors - mainly kiwi kiss and rose red. With SU papers, I loved how I don't have to "think" much about color combinations. It's almost a no-brainer about mixing and matching colors! Woohoo, thanks SU! As always, thank you for stopping by!


Stamp: Easter Blessings (retired)
Ink: Chocolate Chip
Paper: Kiwi kiss, rose red, whisper white; Raspberry Tart DSP
Others: SU top notes die, SU old olive grosgrain ribbon, clear swarovski rhinestones, Fiskar daisy punches

Monday, March 23, 2009

Mojo Monday 79


This Mojo Monday sketches sure are addicting. I found myself checking what the sketch was first thing this morning... hahaha.... Here is my card - I used a retired Stampin' Up set. I think it's called Hats Off. I sprinkled some dazzling diamonds on the hats to make them sparkle! Hope you like my card; thanks for looking!

Stamp: SU Hats Off

Ink: Pretty in Pink, Chocolate Chip

Paper: Pink Pirouette, Chocolate Chip, Whisper White, Bella Rose DSP

Others: SU Watercolor pencils, Martha Stewart lace edge punch, sheer ribbon from Michaels, dazzling diamonds

Sunday, March 22, 2009

Mojo Monday 78


I was so stressed out on Friday night, due to our contractor headaches, that I decided to make a card! This time, I used the sketch for Mojo Monday 78. This is my first to participate... For those who know me, I really, really like pink and brown combinations on my cards. Do you see the head pin and beads I stuck through the ribbon knot? My first time to use one! I also put dazzling diamonds on the flower to make it sparkle. :-) I hope you like my card... Thanks for looking.
Stamp: SU Eastern Influences (image), Pocket Silhouettes (words)
Paper: Pretty in Pink, Whisper White, Chocolate Chip Cardstock; Bella Rose and Sweet Always DSP
Ink: Chocolate Chip, Pretty in Pink marker, SU green watercolor pencil
Others: Small and large oval punch, Martha Stewart lace edge punch, Blue Moon pin and beads, ribbons from Michaels

Friday, March 20, 2009

TGIF!


I am so happy that it's Friday - yahoo! At the same time, I'm excited the Twilight DVD is coming out in a few hours. LOL! Yes, I'm a Twilight mom. Just having fun here.... I have a new card for tomorrow. Until then -

Thursday, March 19, 2009

Pocket Silhouettes


Hi, I made this card two weeks ago, knowing that I'd be busy when this week comes around! I got a lot on my plate the next few days (if not months) coz we're finally moving back to our house. Yesterday and today, I was on the phone scheduling activation of services needed at the house while making sure I had services terminated at the apartment. Overwhelming huh? Today I called on my cleaning guys to make sure that I am on THEIR schedule; that the cable guys will reconnect our Internet (very important!); that I had enough gallons of paint and moving boxes. But that's not all. Last night, I chaperoned my daughter and her friends - they sold Girl Scout cookies in front of Trader Joe's. Today I volunteered at my younger daughter's computer lab class. Tomorrow I have a Finance meeting going on at lunch, and a christian sex education class with my daughter in the evening. Did I mention I still have to pack? Ugh. Yes, ugh is pretty much all I can say. I made a list to make sure I stay on course. So if you don't see anything new for a while, just know that I am somewhere in my house and trying to make sense out of chaos! LOL.


Stamp: Pocket Silhouettes (flowers); Fifth Avenue Floral (words)

Ink: Pretty in Pink; Old Olive

Paper: Whisper White (base), Pretty in Pink, Old Olive DSP

Tools: Scallop edge punch; 1 3/8" punch

Accessories: pink ribbon from Michael's

Blog Widget by LinkWithin